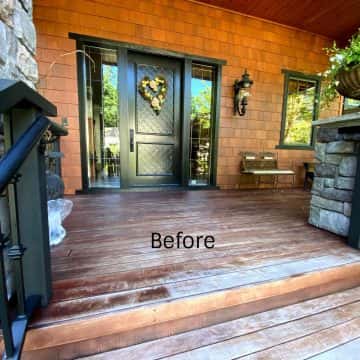
How do you and your family use your deck? Perhaps it’s the main location for summer BBQs, or maybe it gets the most use in the mornings while your enjoy your morning coffee and listen to the birds. No matter what kinds of memories you make on your deck or who you are hosting, it’s important to keep it up to shape. And that means more than just keeping it clean. Your deck needs to be treated with love and care, and that includes staining and sealing regularly.
After years of weathering the Pacific Northwest elements, your deck might be looking less like a haven and more like a haven’t-been-touched-in-ages. But don’t worry – with the right tools, method, and a bit of elbow grease, you can transform your deck back to how it looked when it was first built, if not even better!
Why Choose DIY Deck Restoration?
Sure, you could hire a team of professional deck refinishers like us at Pearl Painters, but you could also tackle it on your own if you’re the DIY-type. Our goal is to make sure that your deck is prepared for the elements, and hopefully with this post you’ll be more prepared to handle such a large job with the right tools in hand.
Be forewarned though – there is a lot that goes into refinishing your deck! This includes time, the right equipment, and loads of patience.

Appropriate Tools are a Must
So you’ve decided to go for it, but don’t just jump in! The best DIYers are prepared as much as possible. And when handling a project as important as deck restoration, you want to make sure you have the right tools. To get started, here’s what we recommend:
- Safety gear (gloves, goggles, mask)
- Pressure washer (ideal) or garden hose with a high-pressure nozzle (if you can’t get your hands on a pressure washer)
- Deck cleaner and a wood brightener – We like Sharkskin (all in 1) Wood Cleaner and Brightener
- Or, for removing an old stain completelym we like Sharkskin Deck and Siding Stipper
- Stiff-bristle brush or broom
- Sander with varying grit sandpaper (60 to 80 grit). We use Festool sanding systems with Hepa Vac.
- Deck stain or sealant
- Tape, plastic, stain brushes, buckets, garbage bags, rags, and mineral spirits if using oil
A Step-by-Step Guide to Rescuing your Deck
1. Deck Diagnosis
First, give your deck a thorough once-over. Look for loose boards, rusty nails or screws, and any signs of rot or mildew. This initial inspection is absolutely key to a successful outcome. If this is your first time doing this, you may miss a couple things, and that’s ok. Just do your best to take note of all the red flags.
2. Prep Like a Pro
To ensure a flawless restoration, gather all necessary tools and materials, including anything needed to address what you discovered in step 1. And of course including all the tools we mentioned earlier.
Now, suit up! Don your safety gear and get ready to conquer that weathered wood.
3. Cleanliness is Next to Deckliness
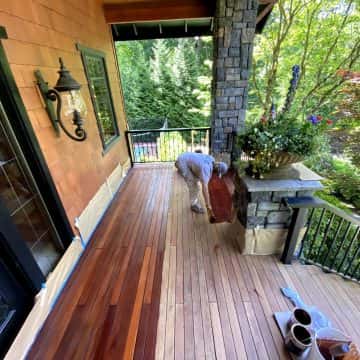
Next, completely clear everything off the deck, making sure everything is out of the way. If you have any plants, make sure that they are fully protected. Now it’s time to clean! Unleash the pressure washer, use appropriate deck cleaner and wood brightener if needed, and diligently clean one board at a time. It’s important if using a pressure washer that you don’t get too close or start and stop in the middle of the board. We recommend not exceeding 800 PSI to avoid damage.
4. Repair
You’ll have an even clearer view of repair needs while cleaning the deck. Once the deck is fully dry, which typically takes 24-48 hours depending on the weather, it’s time to play fixer-upper. To ensure your deck is fully dry we recommend the use of a moisture meter. Each stain will have a different maximum allowable moisture content level ranging anywhere from 8% – 18%. You will want to google “data sheet” for the stain that you decide to go with to find this information.
- Repair Damage: Replace any damaged boards and secure loose nails or screws.
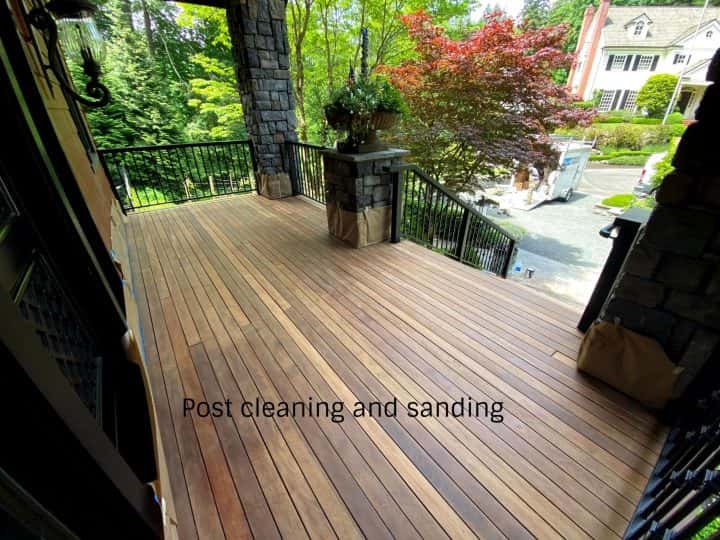
- Sanding: Sanding is a critical step that many DIYers skip, as it is often way more work than the actual staining itself. Sanding will remove splinters, fuzz caused by the cleaner and brightener, and most importantly it will open up the pores of the wood so the stain penetrates deep into the wood fibers. We recommend 60-80 grit depending on the species of wood. Caution, when you start sanding pay close attention that you are not creating sanding scratches, this can happen with softer woods like cedar. To avoid this, move up to a finer grit of sand paper, but be aware: sanding with too fine of a grit will actually polish the surface and seal up the pores, which will prevent stain from soaking in!
- Cleaning, Part 2 — Yes you will need to clean again, but this time you will use a shop vac and a brush. It’s important to get all the dust removed and out of the grain. If the dust remains, it will clog the pores of the wood and prevent stain from soaking into the wood – not to mention a rough finish.
5. Choose and Apply a Stain or Sealant
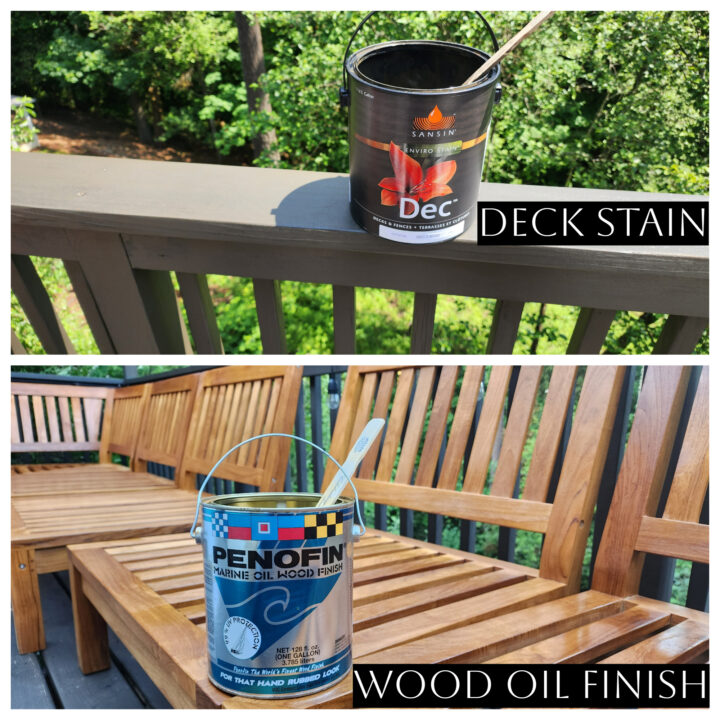
Choose your stain (if changing the color) or sealant (if embracing your current wood’s tone). If going transparent, keep in mind that there is little to no UV protection, so it will need to be reapplied most often. The bonus is that you will be able to show off the natural beauty of the wood.
Semi-transparent and solid body stains (which look more like paint) are great for covering up an old, discolored deck. There are also full water-based stains, oil-based stains and hybrids where it’s an oil resin suspended in water. Each of these types have a time and place to be used.
Even as staining professionals we choose different products for different circumstances. The deck’s location, age of the wood, the condition of the wood, the type of wood, the stain color itself…it all plays into making the best decision for your deck. Our advice is to always test the stain you think you want to use for both color and adhesion before you just go for it.
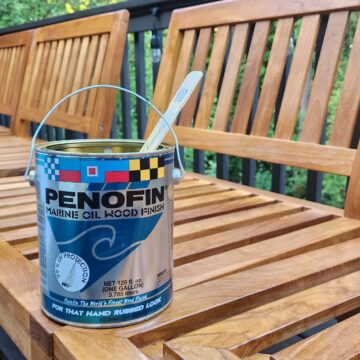
These are stains that we like and use regularly on our deck and fence staining projects: Armstrong Clark, Sharkskin, Messmer’s, Sikkens / PPG – ProLux, Benjamin Moore Arborcoat and Woodluxe, Penofin, Sansin and Cabbots.
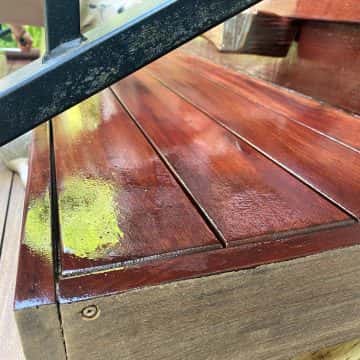
Once you have chosen what you believe to be the best products for your deck, it’s time to start staining. We recommend starting with the handrails first. It’s best to work in a two-person team with one on the outside and one on the inside on the deck so you can catch each other’s runs/drips that will happen on either side. If you let those runs dry, there will be a lot of additional work to fix.
Do the top handrail last so you can keep what’s called a wet edge, which means continuously working down a board without stopping until you get to the end. If you were to stop in the middle of a board and allow the edge of the stain to dry you will get lap marks in the section where you overlap.
Once the handrails are done, then it’s time to do the walking surface. Think about how you will exit the deck so that you don’t stain yourself into a corner, so to speak. Again, keep a wet edge by staining the whole board lengthwise to avoid lap marks. We recommend working two to five boards at once from end to end before you start the next row.
Most stains are one-coat application, but some are two. That’s why it’s important to read the label and data sheet. Some stains need to be back wiped after a few minutes as any stain that does not soak in will not dry and become a sticky mess… again read the label and data sheet!
Allow your stain or sealant to dry completely, which can take a few hours to several days, depending on the product and weather conditions.
A Few Final Tips from the Pros
- Safety first! Always gear up.
- Keep an Eye on the Weather Forecast. Nobody wants their deck to be caught in a freak summer storm mid-transformation. You also don’t want it to be too hot or too cold.
- Regular Maintenance: To keep your deck looking great, we recommend regular cleaning, reapplying stain or sealant as needed, and periodic inspections for damage. Treat it right, and it’ll treat you to years of outdoor bliss.
…or Maybe Hiring Someone Might be Best…
Perhaps you felt super confident when you started reading this, thinking that you could tackle this DIY staining project… only to change your mind and consider hiring a professional by the end. Or maybe DIY just isn’t your jam. If you’d rather leave the deck staining to the professionals, we’ve got you covered. With our expert touch and a sprinkle of magic (okay, maybe just a touch of stain), we’ll have your deck looking fresher than the first sip of lemonade on a hot summer day.
If you’re in need of professionals who make this whole endeavor look easy, Pearl Painters is here for you. We will transform your deck, making it look shiny and new again. Contact us today and let the deck revival begin!
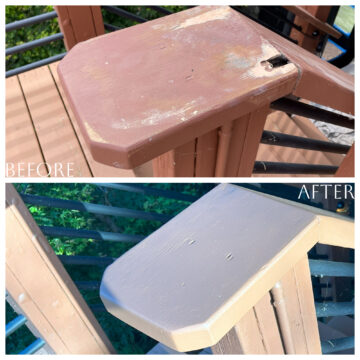
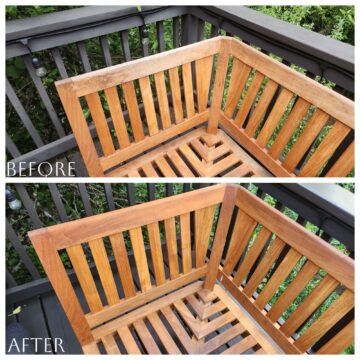
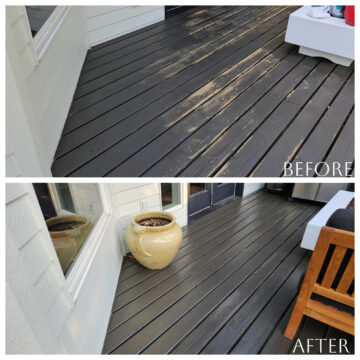
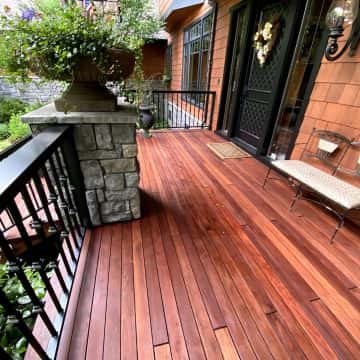
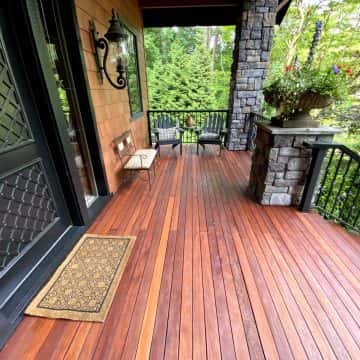
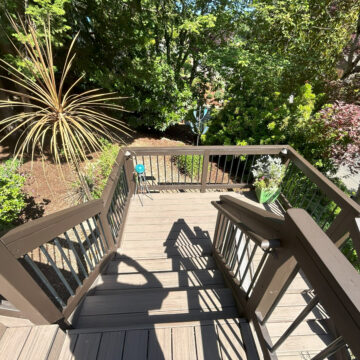
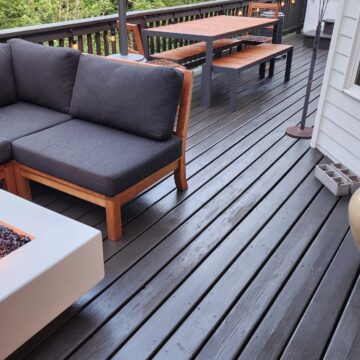
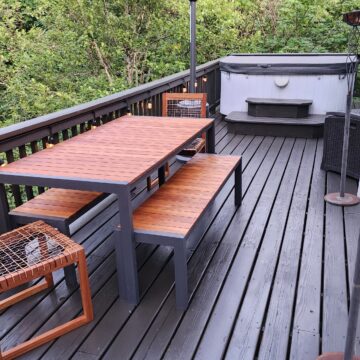
Take a look below at some of our previous deck staining projects: